Hotel staging serves different goals than residential staging: creating aspirational spaces that appeal to target demographics, showcasing amenities effectively, and differentiating from competitors. AI staging allows hotels to test different room configurations and styles efficiently, particularly useful for properties undergoing renovation or repositioning.
Hotel staging considerations include: brand consistency across all rooms, durability requirements (hotel furniture takes more wear than residential), lighting that photographs well for booking sites, and the ability to show rooms at different price points. Virtual staging can show room potential without disturbing guests.
Implementation involves: high-quality room photography, attention to brand standards, and disclosure when photos are virtually staged. The ROI for hotels includes faster bookings, higher rates for staged rooms, and lower marketing costs than physical room renovations. AI staging dramatically reduces the cost and time compared to traditional approaches.
What buyers or guests notice first
Refreshing hotel rooms is a hospitality problem before it is a style problem. The room has to satisfy the guest, the housekeeper, and the owner simultaneously, which is why weak hotel refreshes usually fail in operations before they fail visually. A guest wants comfort, darkness, charging access, clear controls, and a room that matches the photos. Housekeeping needs surfaces that clean quickly and survive chemicals. Ownership needs the room to justify rate and last through years of occupancy. Those priorities are not naturally aligned, so room refreshes have to be planned with much more rigor than residential makeovers do.
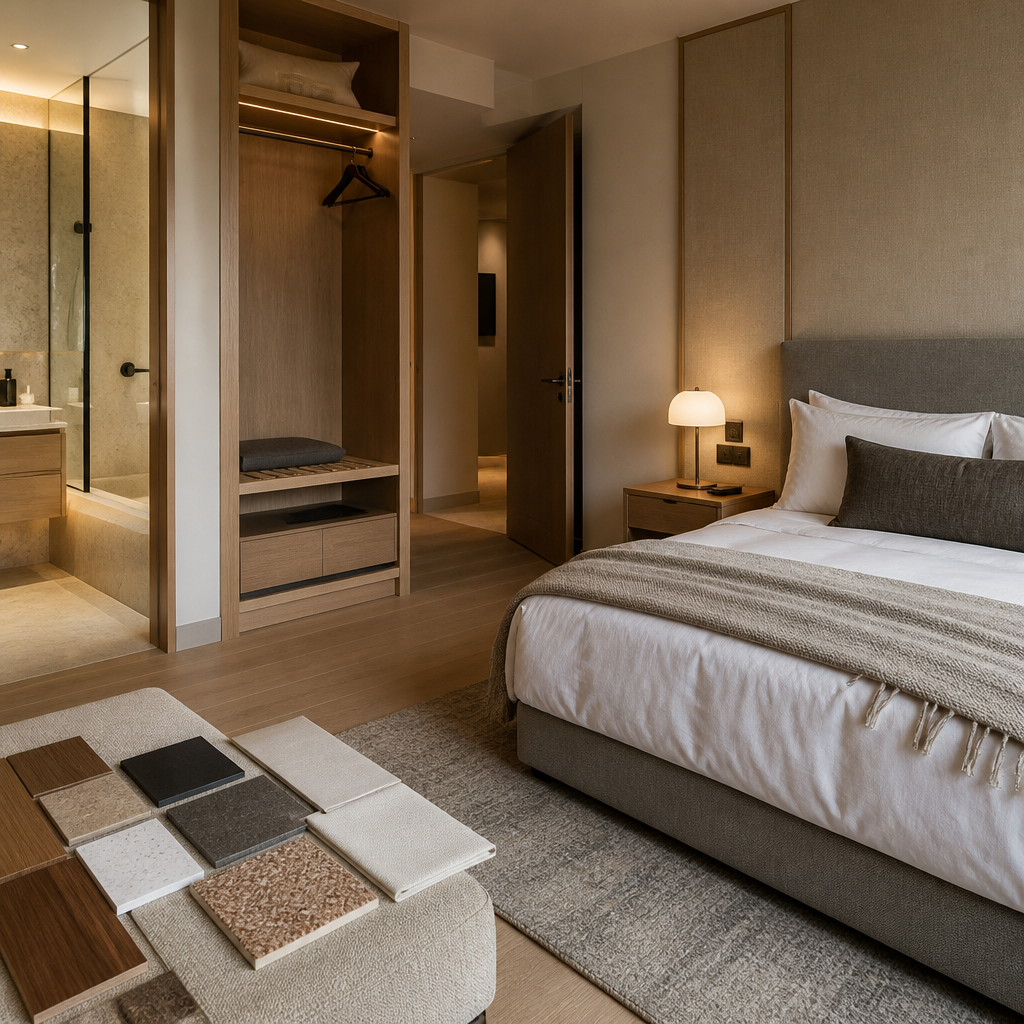
The highest-return hotel decisions often sit in the unglamorous categories: mattress quality, blackout performance, bedside controls, bathroom lighting, luggage landing, and material durability. A beautiful room that makes a guest get out of bed to switch off the lamp or balance a suitcase on the floor is already creating review risk. FF&E budgets can be substantial, but that spending only pays off when the room's daily points of contact improve. Guests remember whether the room was restful and intuitive far longer than they remember whether the upholstery color was fashionable.
Durability and reset speed should be treated as design specifications. Upholstery needs commercial wear resistance, surfaces need to survive repeated cleaning and impact, and flooring should be chosen for replacement logic as much as for appearance. Bathroom finishes need to stand up to hard water, soap residue, and rapid turnover cleaning. Accessibility also belongs in the planning stage, not as a compliance afterthought. Clear widths, reachable controls, desk knee space, and fixture usability all shape whether the room works for more guests with less friction. A hotel room that is elegant only on check-in day is not genuinely well designed.
How to prepare the room
Photograph existing rooms and catalog deficiencies
Walk every room type and photograph from entry, bed, desk, and bathroom angles. Note worn carpet, dated fixtures, inadequate lighting, and any recurring guest complaints. The refresh plan starts from what the guest actually experiences, not from a brand deck.
Define brand requirements before selecting finishes
Franchise standards, brand identity guidelines, and ownership budget constraints all govern what is permissible. Compile these requirements first. A refresh that violates franchise standards will be rejected and redone, wasting both time and money.
Prioritize durability and cleanability over trend
Hospitality-grade fabrics rated for 100,000+ double rubs, commercial vinyl or hard-surface flooring with five-year warranties, and fixtures rated for continuous use. A beautiful chair that stains on the first guest is a beautiful waste of money.
Design refresh scopes at three investment levels
Soft refresh (paint, lighting, textiles, and accessories), mid refresh (soft goods plus case goods and window treatments), and full renovation (all of the above plus flooring, millwork, and bathroom upgrades). Present all three to ownership with cost-per-key and projected impact on guest satisfaction scores.
Specify lead times and order early
Hospitality suppliers often have 8-to-12-week lead times for case goods and custom textiles. Order samples, approve finishes, and place production orders before demolition begins. A refresh that sits half-complete because the headboards are backordered costs more in lost revenue than the headboards themselves.
Coordinate with operations to minimize disruption
Schedule work floor by floor, during low-occupancy periods, with buffer time between room completion and guest arrival. The refresh should never displace a confirmed guest reservation. Operations and renovations are running the same hotel — plan them together.
What weakens trust or clarity
The smartest hotel refreshes feel calmer, clearer, and easier rather than merely newer. They support the operational rhythm of the property while quietly improving guest perception at every touch point. That is why room refreshes should be evaluated less like decorating and more like service design: what reduces complaints, what improves housekeeping speed, what lifts review sentiment, and what survives the next seven to ten years of hard use without looking prematurely tired.