Studio apartments require zone planning because you are fitting several opposing functions into one open space. Define your zones first: sleep area, work area, living area, dining or eating surface, and storage. These zones can and should overlap, your bed might serve as guest seating, your dining table doubles as your desk, but understanding the required functions prevents trying to fit too much into too small a footprint. The first decision is which zone deserves the calmest and best-lit part of the room because that answer organizes everything else.
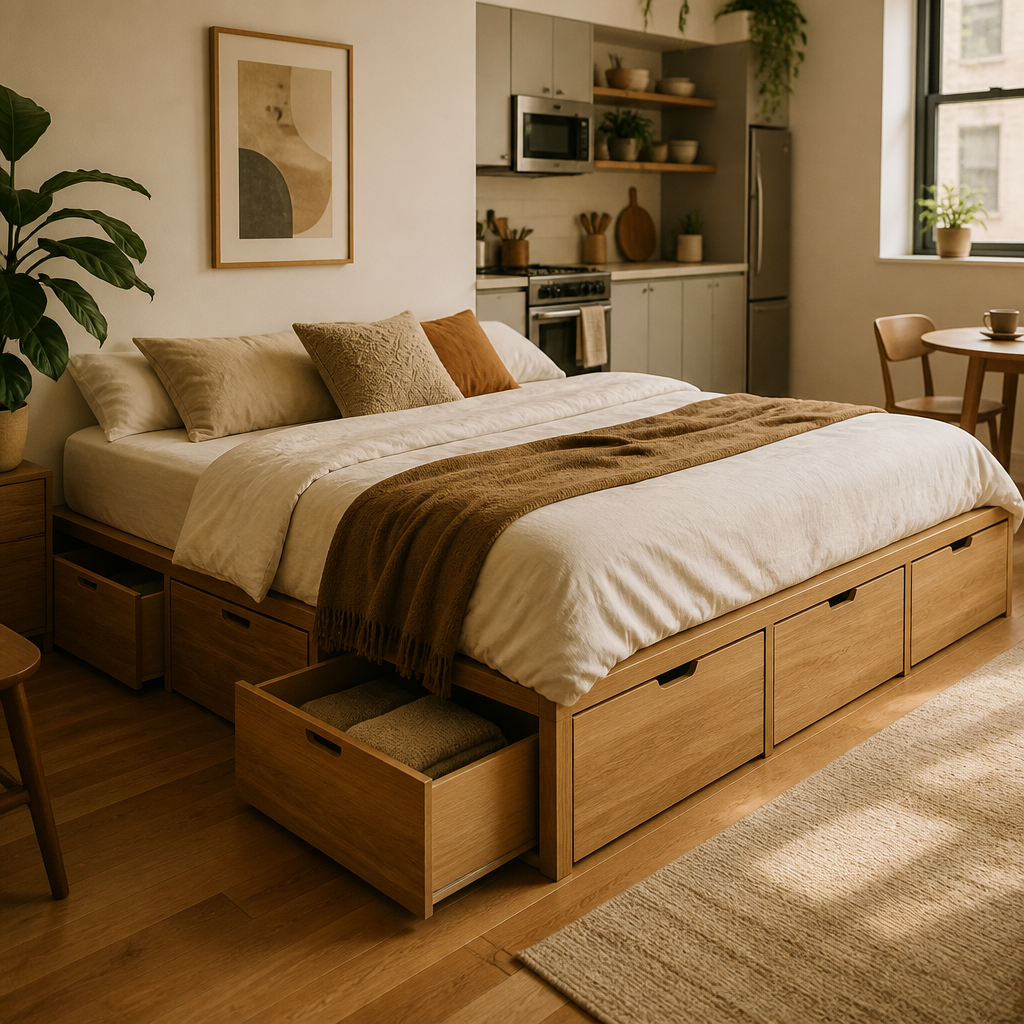
The most successful studio strategies use furniture that serves multiple purposes without feeling like a gimmick. A daybed that works as seating and sleeping, a dining table that converts to a desk, or a storage bench that seats guests and hides linens. Beds with drawers underneath or platforms with storage risers are worth the investment because floor area is the most expensive real estate in a studio. Sectional sofas with built-in storage maximize seating and organization at once.
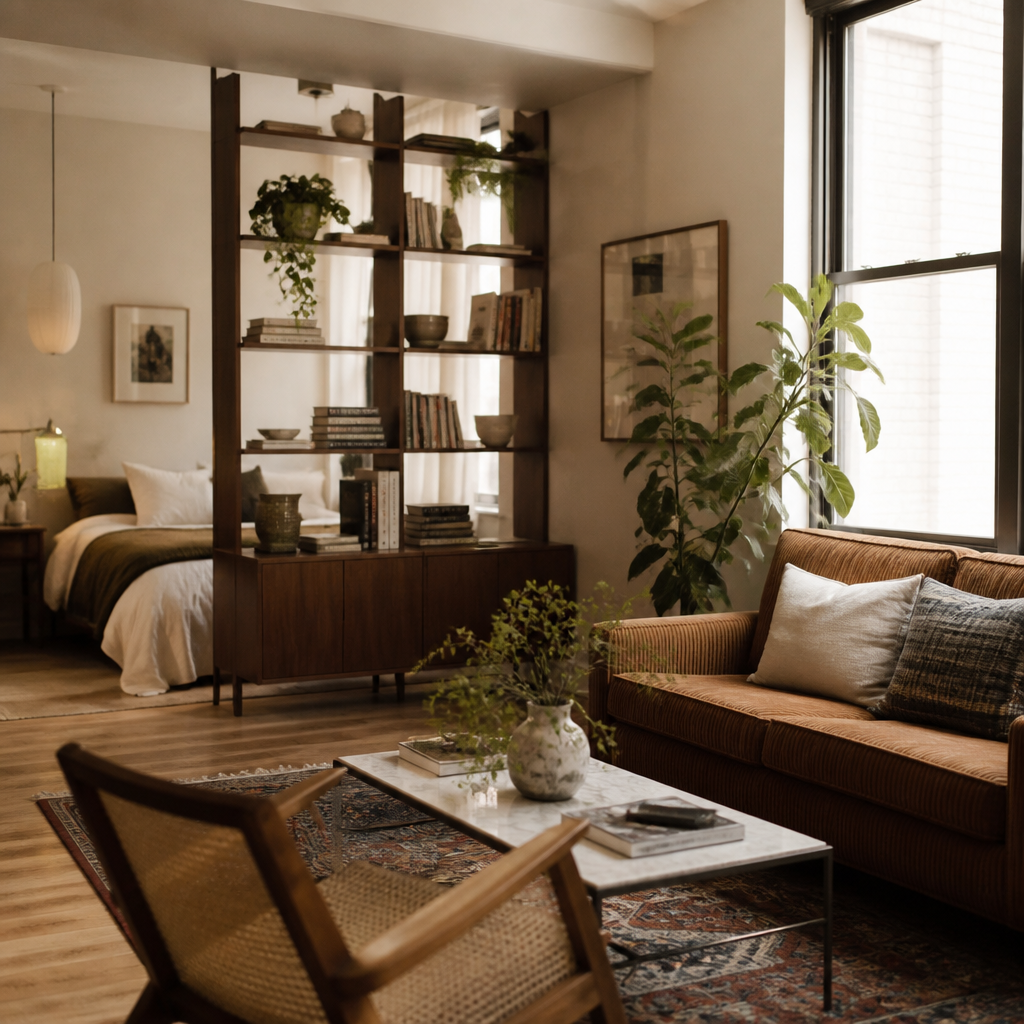
Visual separation helps define zones even in open spaces. A rug under the living area visually separates it from the sleeping area without adding walls. Open bookshelves placed perpendicular to a wall can create a partial room divider that still lets light through. Curtains around the bed area provide privacy for guests or early risers while preserving a softer, more domestic feel than rigid screens. The goal is a space that reads as several distinct functions without feeling carved up or chaotic.
The most common studio mistake is trying to honor every conventional room category in full. A studio usually cannot support a complete living room, full bedroom, proper dining area, and full office all at once without visual and physical suffocation. One or two functions need to be compressed or merged. Good studio design is essentially the art of deciding which absences will feel liberating instead of lacking.
What smaller rooms need most
Studio furnishing is a zoning problem first. The room has to support several incompatible functions without walls, so the layout and furniture choices need to define those functions clearly instead of just filling the footprint.
This guide focuses on that tension: where to place the dominant anchor, how to preserve circulation, and how to use rugs, shelving, lighting, and storage to separate sleep, work, and lounging without making the room feel overplanned.
Multi-use furniture matters here, but only when it genuinely reduces pressure on the room. The best studio pieces preserve floor freedom and simplify routines rather than adding cleverness for its own sake.
How to make the space work better
Measure the whole room and the kitchenette clearances
Record walls, windows, door swings, built-ins, and the space needed to move around kitchen or closet areas before any furniture decisions begin.
Choose which zone gets the best real estate
Decide whether sleep, work, or lounging deserves the calmest and most protected part of the room. That decision organizes everything else.
Place the largest multi-use anchor first
Start with the bed or sofa, whichever dominates the room most, and make sure it still leaves believable circulation and sightlines.
Use rugs, shelving, and lamps to separate functions
These elements can define bed, work, and lounge zones without adding walls or making the studio feel cut up.
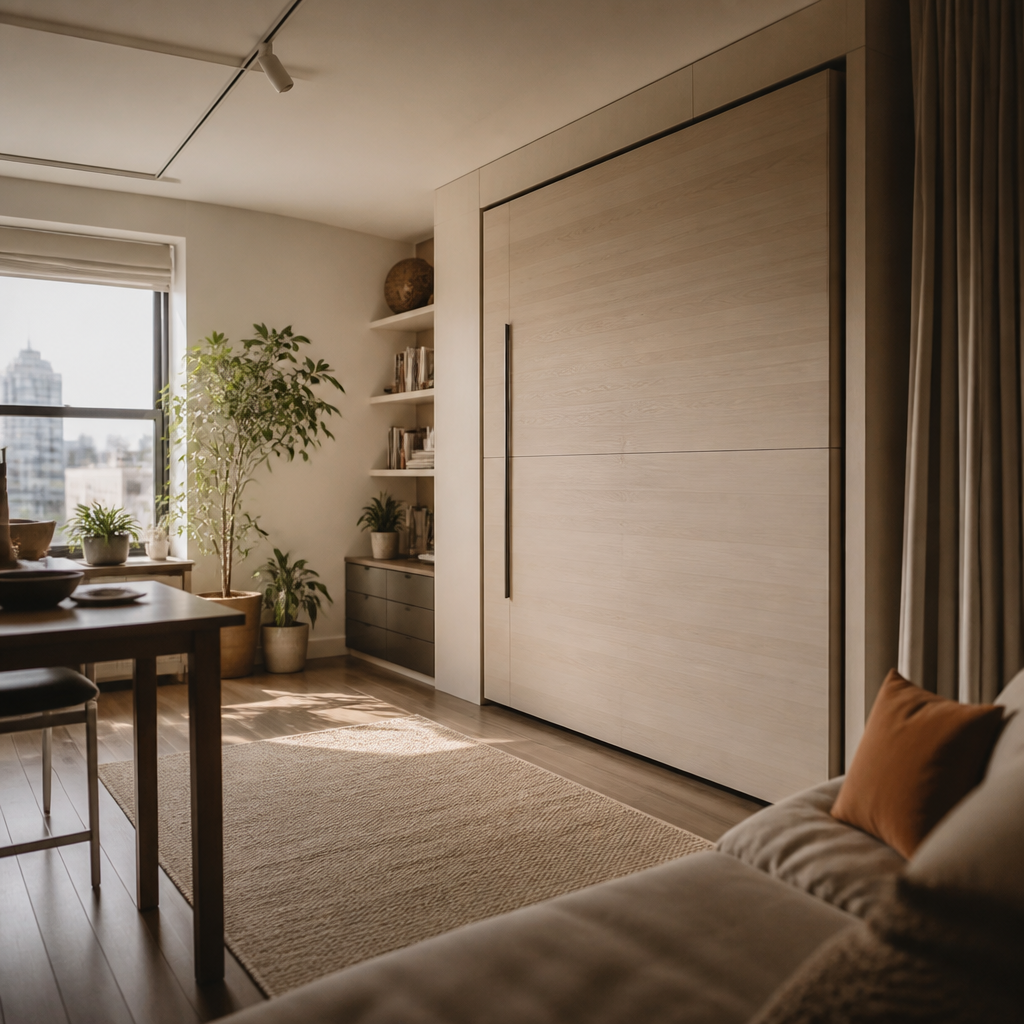
Add only storage that preserves floor freedom
Favor vertical, under-bed, and wall-adjacent storage so the room stays usable and does not become a maze of surfaces.
Stop before every room category is fully represented
Studios work better when one or two functions merge gracefully than when every category is forced into the room at full size.
What usually makes compact rooms feel worse
A successful studio feels calmer than its square footage suggests because the room's jobs are obvious and clutter has somewhere believable to go. That clarity is the main goal of good studio furnishing.